Product Information
https://mikrotik.com/product/RB951Ui-2HnD#fndtn-specifications
Setup
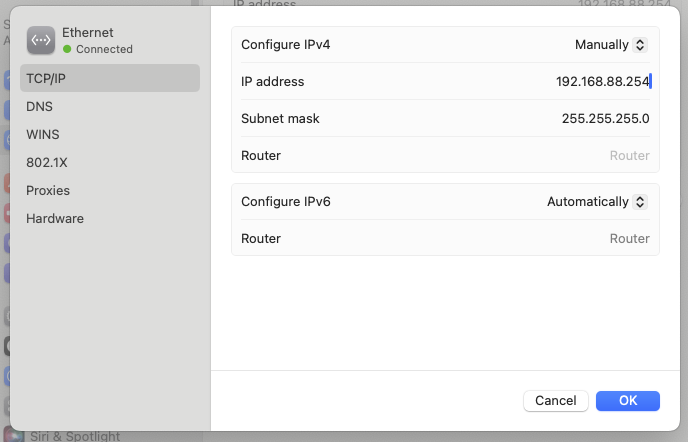
Configure the M2’s Ethernet port
I like using 192.168.88.254 because then I always have access when resetting the device to 192.168.88.1
Route Deletions
Make sure you don’t have old static routes on your Mac.
➜ ~ sudo route delete -net 192.168.88.0
Password:
delete net 192.168.88.0
➜ ~ sudo route delete -net 192.168.88.0
route: writing to routing socket: not in table
delete net 192.168.88.0: not in table
Checking the existing routing table
netstat -rn | grep 192.168.88
192.168.88 link#6 UCS en0 !
192.168.88.2/32 link#6 UCS en0 !
Reset Procedure
At the back you have RES / PWR and ACT lights. There is also a button. Getting this device to reset to defaults is a huge huge mission. You can’t use a paperclip as it’s too tight to the power input, so use a longer pen instead.
https://help.mikrotik.com/docs/display/UM/RB951-series
https://help.mikrotik.com/docs/pages/viewpage.action?pageId=16351549
The challenge is to get the device back on 192.168.88.1 which is the default for most MikroTik routers. From the manual below, repeatedly trying #1 below didn’t work:
Buttons and Jumpers
RouterBOOT reset button (RESET, front panel) has three functions:
- Hold this button during boot time until LED light starts flashing, release the button to reset RouterOS configuration (total 5 seconds)
- Keep holding for 5 more seconds, LED turns solid, release now to turn on CAPs mode (total 10 seconds)
- Or Keep holding the button for 5 more seconds until LED turns off, then release it to make the RouterBOARD look for Netinstall servers (total 15 seconds)
After two hours I gave up resetting with a pen, and moved to get another computer that had 2.4 GHz (the Mac doesn’t). There I was able to finally connect to the router, also after much struggling. The key to reset was to not wait 5 seconds, but around 3 seconds. The next problem was that Ether1 was not active, but Ether2 was! I changed the IP address binding to Ether1, and lost all connectivity again. So I rewatched this video by Atomic Access:
- https://www.youtube.com/watch?v=OjLNA84ogUM
Apparently after another try, I managed to get in (via Ether2).
Clear Router of all Nonsense
You want to end up with a Bridge of port Eth1 and Eth5 so that you can plug devices in which can then obtain DHCP.
Here is how you clear:
/ip/firewall
Remove every single default rule as it will mess with you.
/bridge/ports
Add ether1 as later you’ll need it when killing the bridge
Now you can reassign ether1’s IP address.
/ip/firewall/nat
Now you can kill the bridge.
Remove the NAT rule because you want to control NAT and wave to know what you’re doing.
ip/dhcp
Reassign DHCP from bridge to Ether5. You’ll get this:
Invalid value in DHCP Option Set. Clear the invalid option by pressing up arrow.
Test by plugging in a cable in Ether5, and see if you can see a DHCP value being assigned:
/ip/dhcp-server/leases
Update your Router Firmware
Unfortunately RouterOS has bugs. It’s always best to use the latest version of both RouterOS and the RouterBOARD firmware. In the case of a RB951Ui-2HnD, you’re looking at the XYZ firmware. This is a mission to find out, but I googled it.
https://mikrotik.com/product/RB951Ui-2HnD#fndtn-specifications
Model: 951Ui-2HnD
Serial Number: XXX
Firmware Type: ar9344
Factory Firmware 3.22
Current Firmware: 7.5
Download the latest.
23 May 2024: 7.143 stable
The final step in this puzzle was to enable DHCP on the IPMI!
What I thought was going to be an hour of routine work ended up taking many more hours.
