Guide to Enable Remote Desktop for 2 Administrative Users
- Start
- Server Manager
- Local Server
- Remote Desktop will be disabled. Enable it by clickon the ‘Disabled’.
On Windows 2022, this screen pops up:
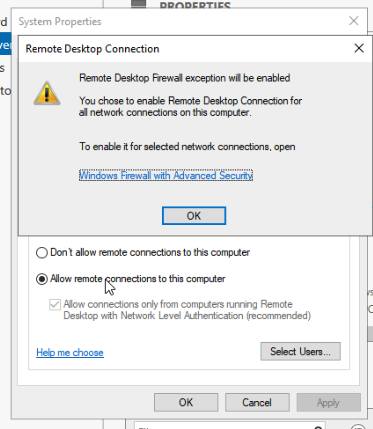
- Click ‘Allow’ and decide if you want only computers with
Network Level Authenticationallowed to connect.- In my experience Network Level Authentication won’t do if you’re connecting over the internet.
- Click Ok when prompted about firewall stuff. It automatically just adds the rules so you don’t have to worry about the firewall.
- Done
Firewall
In my experience it’s not necessary to add RDP rules, but here is a guide.
Open Windows Firewall with Advanced Security

netsh firewall set service type = remotedesktop mode = enable

IMPORTANT: Command executed successfully.
However, "netsh firewall" is deprecated;
use "netsh advfirewall firewall" instead.
For more information on using "netsh advfirewall firewall" commands
instead of "netsh firewall", see KB article 947709
at https://go.microsoft.com/fwlink/?linkid=121488 .

Ok.
Allow More Users
Once you’ve done this you probably want to enable that second user who needs to also do administration. Do this:
Start / gpedit.msc
Go to Computer Configuration > Administrative Templates > Windows Components > Remote Desktop Services > Remote Desktop Session Host > Connections.
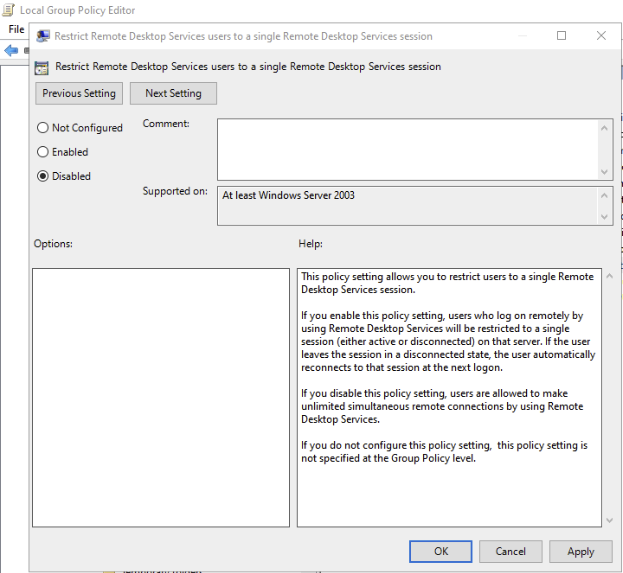
2 Steps, Step 1 & 2:
1. Double click Limit number of connections and set the Maximum Connections allowed to 999999.
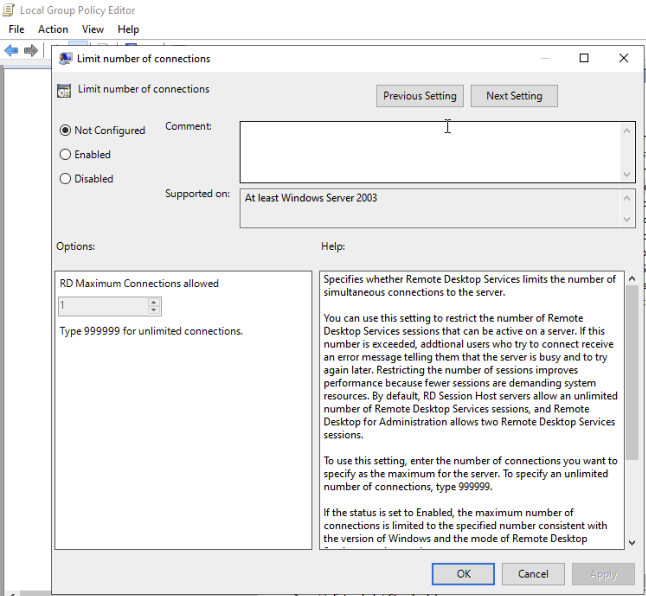
Please note you’ll still only have two connections and you will need proper RDS licenses to have more than 2.
2. Set Restrict Remote Desktop Services user to a single Remote Desktop Services session to Disabled.
Sometimes it’s also necessary to run the command below:
gpupdate /force