Table of Contents
Introduction
This article explains how to make a downloaded ISO file bootable on Mac OS. The test was was an Mac Mini M2 but in theory this should work across all Macs and all versions.
Instructions
Download the ISO
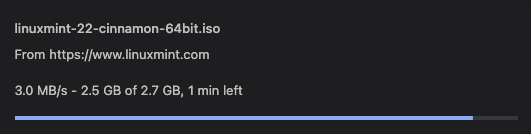
Download the ISO to a temporary location on your hard drive.
Windows
Windows has downloadable ISOs for both Windows 11 and Windows 10.
Linux Mint TL;DR
Start here: https://www.linuxmint.com/download.php
The TL;DR guide is using the Linux Mint ISO, but it works just as well with the Windows ISO files.
➜ cd ~/Desktop

➜ hdiutil convert -format UDRW -o linuxmint linuxmint-22-cinnamon-64bit.iso
Reading Driver Descriptor Map (DDM : 0)…
Reading Linux Mint 22 Cinnamon 64-bit (Apple_ISO : 1)…
Reading Apple (Apple_partition_map : 2)…
Reading Linux Mint 22 Cinnamon 64-bit (Apple_ISO : 3)…
Reading EFI (Apple_HFS : 4)…
Reading Linux Mint 22 Cinnamon 64-bit (Apple_ISO : 5)…
..........................................................................................................................
Elapsed Time: 14.243s
Speed: 194.7MB/s
Savings: 0.0%
created: /Users/eugene/Desktop/linuxmint.dmg

➜ diskutil list

Found /dev/disk4

➜ diskutil unmountDisk /dev/disk4
Unmount of all volumes on disk4 was successful
➜ sudo dd if=linuxmint.dmg of=/dev/rdisk4 bs=1m status=progress[r match disk#]
Password:
[The wait time can be long, 5 to 10 minutes]

➜ diskutil eject /dev/disk4
The job is done.
Proxmox example
If you want to make a Proxmox 8.2.1 bootable USB disk, you might download the latest ISO from here: https://www.proxmox.com/en/downloads
Then start a terminal:
mkdir ~/Desktop/iso
cd ~/Desktop/iso
wget https://enterprise.proxmox.com/iso/proxmox-ve_8.2-1.iso
Convert the ISO
Convert the downloaded ISO file to an .dmg file. Here are some examples:
hdiutil convert -format UDRW -o proxmox ~/Desktop/proxmox-ve_9.1-1.iso
...
Elapsed Time: 5.270s
Next put the USB disk into the Mac’s USB port.
Figure out the USB disk number
The best way to figure out the disk number is to carefully observe the disk size written on the USB disk. If your disk is 8 GB the output won’t display exactly 8GB, for example, it might display 7.8 GB. Also look for asterisks. If you’re still unsure, put the disk in, run the utility. Take the disk out again, and run the utility again. You’ll see something is now missing.
This disk number is important because it will be used throughout the rest of this tutorial.
diskutil list
<snip>
/dev/disk7 (external, physical):
#: TYPE NAME SIZE IDENTIFIER
0: GUID_partition_scheme *7.8 GB disk7
<snip>
On my system, disk7 was the USB disk which I only knew because I could compare the sizes with what I already knew was there. The disk name is important because it’s used in the next step.
Unmount the disk:
diskutil unmountDisk /dev/disk7
...
Unmount of all volumes on disk7 was successful
Use dd as sudo to make an input file and output file of block size 1m. Please note this could take a while, for example, for example on the Mac Mini M2 50 seconds for 1 gigabyte, and up to 4 minutes for 1.6 gigabytes.
Note: The output file (of) below rdisk7. The 7 is important because it’s the disk number you obtained earlier.
sudo dd if=proxmox.dmg of=/dev/rdisk7 bs=1m status=progress
...
1395881984 bytes transferred in 213.717118 secs (6531447 bytes/sec)
In the above procedure, if you get the disk number wrong, you might end up with something like this:
dd: /dev/rdiskX: Operation not permitted
Eject the disk
diskutil eject /dev/disk7
The job is done.
Troubleshooting
Struggling to format your USB disk?
“Couldn’t modify partition map.” or “Couldn’t modify partition map. : (-69874)”
Do this in a terminal:
diskutil list
Identify the disk. If you’re still unsure, pull disk disk out, and see what changed.
Then:
diskutil eraseDisk FAT32 USB /dev/disk7